
The patent-pending negative rake carbide cutters are a gamechanger in the woodworking field. These cutters allow for safer and smoother cutting, which makes it possible to transform super-hard woods as well as man-made materials without having to sand. A smooth cut means that you will spend less time polishing the finished project. Negative-rake cutters are safer than traditional carbide ones and are much easier to use.
Cutting forces are reduced by positive rake carbide cutters
Carbide cutters that have positive rake angles can lower cutting forces and chip loads. These cutters have a greater chip-reduction ability, since a positive rake cutting blade has a thicker edge than its counterpart. However, chip-reduction capabilities of positive-rake carbide cutters are only qualitative indicators. This depends on other factors like the wedge's thickness and strength. The positive rake has a thinner wedge that is more susceptible to breakage due to high chip load and vibration. Impact loading can cause the wedge to break down, which can lead to poor productivity.
The relative orientation between the cutting face and the work is known as the rake angle. There are two rake angles: positive rake and negative rake. A positive rake refers to a rake angle less than 90 degrees. Negative rake carbide cutters have a lower angle of the rake and a sharper cutting edge. Both positive and negative rake carbide cutting tools have their pros.
Cutters made from negative rake carbide produce better cuts
Negative rake carbide cutters are a great choice if you want to achieve a safe and smooth cut. These tools will make it easy to cut super-hard woods or man-made materials. These tools will simplify your work and reduce the need to catch and chip. These cutters are also made to last for a long time. An average Negative Rake Carbide Cutter will last for approximately 80 hours.
Easy Wood Tools created the negative-rake carbide cutter. This type of cutter cuts harder woods and acrylics better, with a longer cutting life. These cutters include a replacement 4-40 countersunk screw. This type of carbide cutter also has the optimal three G's of Carbide. They're a great investment for your woodworking projects.
TiN carbide cutters reduce cutting forces
TiN carbide cutting tools produce lower cutting forces than standard tools. However, TiN carbide cutting speeds do not directly affect the cutting force. The cutting force is affected more by process parameters. This model, known as the signal-to–noise ratio (SNR), was used to estimate this effect. This model allows you to calculate the effect of cutting parameters on forces.
Researchers examined the cutting power of two kinds of coated carbide tool: one made from uncoated carbonide and the second with Titanium Nitride(TiN). They used optical microscopy to assess flank and crater wear and machine vision systems to monitor cutting forces. The TiAlN-coated carbide tool showed the best response to cutting forces.
The results of the experiment show that the temperature of TiN-coated tungsten carbide cutters changes with various cutting parameters. Line I experiences a gradual increase in temperature at 280360/min. Line J and Line K experience rapid increases at 320440/min. This was due to an increase in the feed per tooth, which is responsible for the rise in the cutting temperature of the TiAlN coated tools.
Authentic Easy Wood Tool negative rake carbide cutters
The Authentic Hardwood Tools negative rake carbide cutting tools are the best. These tools are made in the USA and can be used with the Easy Wood Tools Mini, Pro Size Roughers, and Micro Detailers. Negative rake carbide cutters provide a smoother finish with fewer "grabs" and are made with the best grade of carbide to ensure maximum performance and durability.
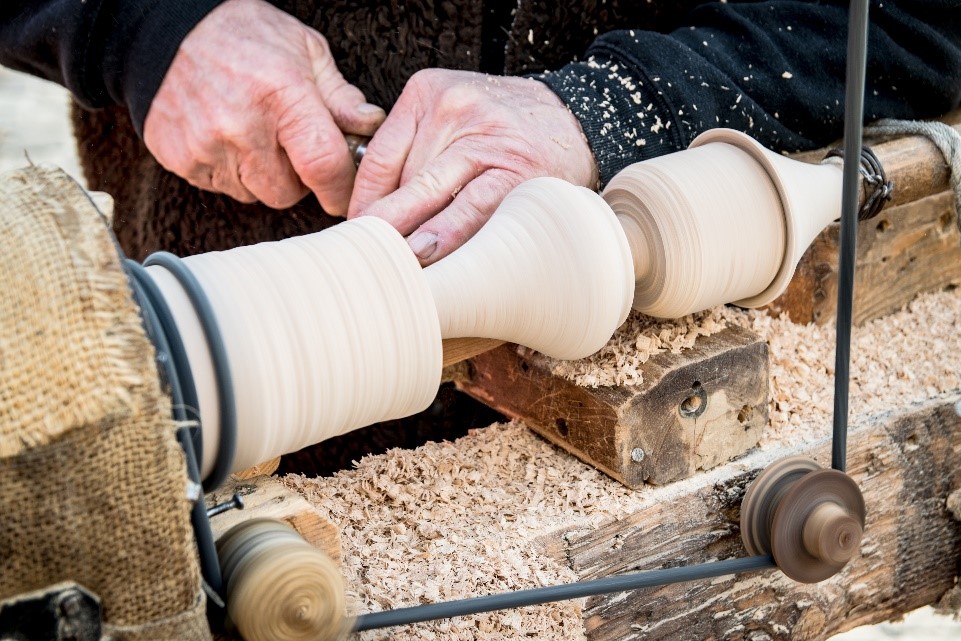
Easy Wood Tools offers carbide cutters that reduce chipping and catch, as well as other problems associated with working with manmade materials. They reduce chipping, eliminate the need for sharpening, and provide an ultra-smooth finish. The carbide cutting blade is supported directly underneath the workpiece. This transfers pressure downwards to the wood. Easy Wood Tools negative rake carbide cutters are ideal for woodturning projects.
FAQ
Are there any tips for starting a woodworking enterprise?
It is hard work to start a woodworking company. But if you're passionate about your hobby, you won't mind putting in the effort. You will probably love the challenge of starting your own business.
You should remember that unexpected issues may occur when you launch a new venture. Unexpectedly, money might run out. You might find customers not willing to pay the amount you expected. You must be ready to deal with such situations in order to survive.
It is a good idea to create a separate bank account just for your company. You'll know exactly how much money is coming in by setting up a separate bank account.
What material would you recommend to start learning woodworking?
Start with softwoods, such as pine or poplar. These two are the easiest to master, then you can transition to hardwood.
What's the time taken to finish a piece furniture?
It all depends upon the size of your piece of furniture. For smaller projects such as picture frames and boxes, it can take less than a day to complete. Larger projects like tables and desks take many days. It takes time in order to properly stain or seal the wood.
How do I calculate woodworking prices
When calculating the costs of any project, it is important to keep them as low and affordable as possible. Always ensure you are getting the best possible price for materials. It is important to take into consideration all factors that can impact the cost of your projects. These include time, skill and experience. If you want to get an idea of what you can expect to spend on different types of woodwork projects, check out our guide to the average price of common household DIY tasks.
Statistics
- Average lumber prices rose about 600 percent between April 2020 and May 2021. (familyhandyman.com)
- Woodworkers on the lower end of that spectrum, the bottom 10% to be exact, make roughly $24,000 a year, while the top 10% makes $108,000. (zippia.com)
- If your lumber isn't as dry as you would like when you purchase it (over 22% in Glen Huey's opinion…probably over 10-15% in my opinion), then it's a good idea to let it acclimate to your workshop for a couple of weeks. (woodandshop.com)
- Overall employment of woodworkers is projected to grow 8 percent from 2020 to 2030, about as fast as the average for all occupations. (bls.gov)
External Links
How To
How to drive a nail through wood
To drive a nail into wood, the first step is to select the right size and type hammer. There are many types of hammers that you will find: claw hammers and sledgehammers; mallets; ball peen hammers; and hatchets. Each kind of hammer has its own advantages and disadvantages. A claw hammer, for example, is the best choice if you need to hit nails hard. However, it's not easy to know exactly where the impact will land. The sledgehammer works well for large areas, but is too heavy for smaller tasks.
After choosing the right hammer, place your hand flat against the side of the head so that the handle rests comfortably in your palm. Hold the handle in your hand, but don’t force it too hard that you break. Hold the hammer straight up, keeping your wrist relaxed. Now, move the hammer towards the center of the nail by swinging it back. The impact of the hammer hitting the nail should be felt. Practice swinging your hammer on a block of wooden until you feel comfortable.
Hold the hammer near your body until you're ready for the nail to be driven. To ensure that the nail is perpendicular on the surface of the wooden floor, position it. Keep your eyes focused directly on the tip of the nail. Swing the hammer forward, then follow through with the motion of the hammerhead. You can repeat this several times, increasing your swing speed. Once you've mastered the technique, try adding power to your swings. To make it more powerful, hold the hammer up high to your shoulder and then bring it down. You will be able to use more energy and put your best foot forward.
Once you've nailed the first hole, remove the hammer from the nail. To pull out the remaining nails, use a screwdriver or pry bar. To avoid splitting the wood, make sure the nail heads are not touching the board's surface.