A template will assist you in positioning your patterns on the wooden surface. It also gives you references to work from while drawing on the wood. You can use a template to make repeat pieces. It can also be saved for future use. Your template must be prepared first. Read on to learn how to create one. Here are some useful tips for creating a template for wood carving. Now you can start to make your patterns on the wooden surface!
Woodcarving projects for beginners
For most beginners, a chess pawn is an excellent beginner woodcarving project. This is due to the fact that the pawn has rounded edges, which require more precision in shaping its head. The pawn can be worked on until it is the right shape. This is especially important for beginners because you need to produce 16 identical pieces. This course will help you learn how to create curves and balance your pieces.
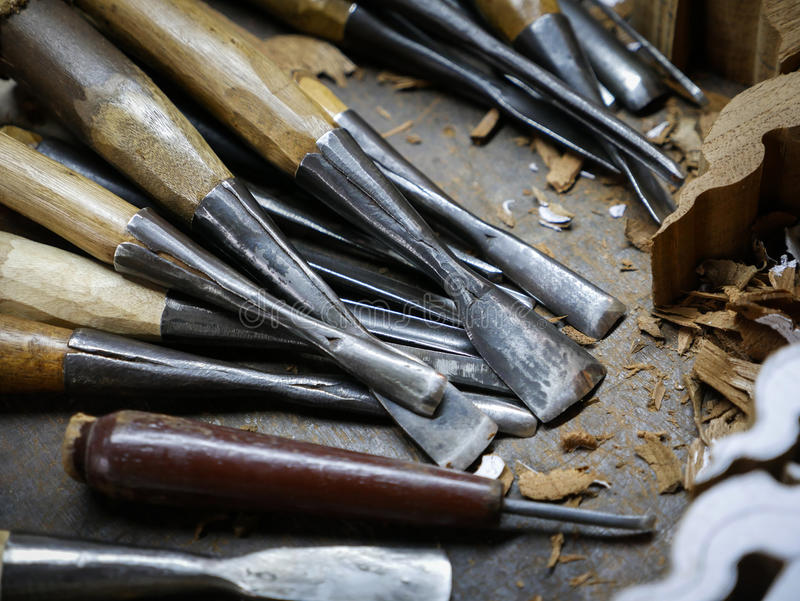
Different wood types require different techniques, depending on the skills you have and the materials available. These woods may require more complex tools than others. It is essential to choose the right tools. A dull tool makes the job difficult and the wood more susceptible to damage. Beginners should start with softer woods, such as balsa or birch.
3d wood carving designs
3d wood carving is a good choice for beginners. This type of pattern can be used to carve complete-sized bird figures. If you're a beginner, it is best to start with a larger piece of wood. 3D designs will require you to switch knives more often. You can carve both a cartoon bear and a real bear.

The bear is a simple animal to carve because it is round and burly. You can start carving this animal by creating a 360-degree model and finding a reference photo that shows the main shapes. Once you've mastered the technique, you can either carve the bear with a CNC or by hand. This pattern is flexible enough to be creative in any way. This pattern is a great way for you to learn how to carve, and to create art that will last a lifetime.
Dongyang wood carving
Dongyang woodcarving is an ancient Chinese art form which has become a distinct category. The art form dates back as far as the Tang Dynasty, when it first appeared in the Taihe year. Dongyang Wood is also often carved using the legend of a white snake. This type of carving, like its name, is very detailed. These works can be more costly than other types of wood carvings.
Dongyang wood carvings are great for decorating any type of wooden surface. These works can both be displayed at home and in public places. One example of this is the piece "The Legend of the White Snake". This story is about an immortal snake and his love for a young woman. He was taken to Leifeng Pagoda where he was imprisoned. But he was freed by the collapse of the pagoda and the lake dried.
Whittling flower
A whittling project is a great choice for beginners in wood carving. There are several ways to carve this beautiful flower, and each one is equally rewarding. You can begin by drawing the petals of your flower to get an idea on the shape of the finished product. You can then transfer this design to the wooden chunk. This will enable you to visualize the finished shape, eliminate any unneeded parts, and make carving easier.
Specialized tools are required to carve flowers. A gouge helps to cut the petals as well as the background of the flowers. A gouge can be used to cut stems simultaneously, drawing them as you go. You can also carve intricate details with a Dremel. To achieve different shapes, the blade can be adjusted.
Wooden ARO
Aro's wooden ARO drawings make a great way to collect his works. These artists were committed to preserving old traditions and creating works using old objects. Aro created a wooden relief out of a tabletop, Leipaenkeli. It is Finnish for "bread angel", and Aro did this in 1975. Despite the simple material used in the piece, it contains many messages about traditional values. Check out his biography to learn more about the artist.
Students engage in a multidisciplinary STEAM-based production process in order to create a unique work for a public display. Many students choose to work with an established regional or international artist or select a project that showcases the talents and passions one student. The students also work with a mentor who has been successful in their chosen career field and focuses on his or her own journey. The program is aimed at disadvantaged student groups, and often includes a diversity of community involvement, which includes the local and global arts communities.
Wooden Cragg
A variety of woodcarvers are using the craft to create stunning pieces of art. One popular technique is 'Pierced Relief', which involves carving a whole piece of wood using a single block. Another artist uses this method to create abstract pieces which are less abstract but still retain the details of their original pieces. Remy Clemente, Morgan Maccari and Morgan Maccari both from France depict a series made of wood frames that have been melted into a metallic frame.
Beginners can start by making simple geometric patterns. Once you have mastered the basic skills, you can move on to more difficult designs. Try printing out drawings to get a feel of the technique. Wooden carving drawings are an excellent way to practice. Make sure to follow all instructions and guidelines carefully. It will be easier to create wood carving drawings that achieve the results you want. There are many types of designs to choose from, including flowers, fruits, and even animals.
FAQ
How much money will I need to get started?
Since every project differs, it is impossible to give exact numbers. Here are some factors to help you estimate how much money you will need.
-
Materials cost
-
Tools and equipment
-
Time spent on the Project
-
The hourly rate
-
How much profit can you anticipate to make
-
You can hire help, regardless of whether you have a plan.
It's a good idea for beginners to start with small projects like frames and boxes. You will gain more experience and be able to tackle larger projects.
How can a beginner woodworker make money?
Many people are beginning to learn how build furniture to launch an online business. There are other ways to make money if you're just starting out building furniture than selling on Etsy. You can sell at local craft fairs. Or you could offer workshops for others who want to learn how to build their own furniture. Perhaps you have some experience as a carpenter/builder and would like to offer your services, such as remodeling homes and creating custom pieces.
Can I refinish furniture that I make?
Yes! There are many options for refinishing furniture that you don't need to hire a professional. Here are some examples:
Use sandpaper for removing stains and scratches. Next, wipe the surface clean with a damp cloth.
Apply clear polyurethane varnish. Allow to dry thoroughly before moving furniture.
Paint furniture with acrylic paint.
Use stain instead of paint. Furniture will look richer with the stain.
Shellac wax is applied. Applying wax will give the wood shine and protection.
Do you have any tips on starting a woodworking business?
It takes a lot of effort to start a woodworking business. You won't mind working hard if your hobby is something you love. You'll enjoy the challenge and rewards of owning your own business.
You should remember that unexpected issues may occur when you launch a new venture. You might run out unexpectedly of funds. Perhaps customers won't pay you as much as you had hoped. To survive, you'll need to be prepared for such situations.
One tip is to have a separate banking account for your company. This will ensure that you always know how much money has come in.
What is the main difference between plywood or particle board?
Plywood can be described as a mixture of layers and wood that have been pressed together with pressure. Plywood comes in several thicknesses and is commonly used for cabinets and flooring. Particle board is made from sawdust mixed with resin and then compressed into large blocks. It's often used for home renovation projects. Both types of boards are durable and easy to cut.
How do I organize my shop?
To keep your workshop tidy and organized, you should first create a place for tools storage. You want your tools to stay clean and free from debris and dust. To hang accessories and tools, use pegboard hooks.
Statistics
- Most woodworkers agree that lumber moisture needs to be under 10% for building furniture. (woodandshop.com)
- The U.S. Bureau of Labor Statistics (BLS) estimates that the number of jobs for woodworkers will decline by 4% between 2019 and 2029. (indeed.com)
- If your lumber isn't as dry as you would like when you purchase it (over 22% in Glen Huey's opinion…probably over 10-15% in my opinion), then it's a good idea to let it acclimate to your workshop for a couple of weeks. (woodandshop.com)
- In 2014, there were just over 237,000 jobs for all woodworkers, with other wood product manufacturing employing 23 percent; wood kitchen cabinets and countertop manufacturing employing 21 percent. (theartcareerproject.com)
External Links
How To
Here are some tips on how to drive nails in wood
First, choose the right size and type of tool to drive a nail through wood. The most common types of hammers are claw hammers, sledgehammers, mallets, ball peen hammers, and hatchets. Each type of hammer has its pros and cons. A claw hammer, for example, is the best choice if you need to hit nails hard. However, it's not easy to know exactly where the impact will land. A sledgehammer is useful for striking large areas at once but too heavy to be effective for smaller tasks.
After selecting the right hammer, you will need to place your hand flat against one side of the head. The handle should rest comfortably in your hands. You can grip the handle with your fingers, but not so tight that it causes injury. Your wrist should be relaxed while you hold the hammer straight upwards. Then swing the hammer back toward the ground, aiming for the center of the nail. You should feel the impact of your hammer hitting the nail. You can practice swinging the hammer with a block or wood until you feel the rhythm.
The hammer should be held close to your body when you are ready to begin driving the nail. Position the nail, so it's perpendicular to the surface of the wood. Keep your attention on the tip. Swing the hammer forward, then follow through with the motion of the hammerhead. Keep doing this until you are comfortable with the swing. After mastering the technique, you can add power to your swings. You can hold the hammer over your shoulder and forcefully bring it down. You'll have more energy to work with.
Once you've nailed the first hole, remove the hammer from the nail. To remove the remainder of the nails, you can use a screwdriver/pry bar. To avoid splitting the wood, make sure the nail heads are not touching the board's surface.