
If you are planning to use a biscuit joiner to construct your furniture, here are some tips: choose the biscuit size that best suits your furniture needs, make sure that the bottom shelf line is level, and use proper safety equipment while using the machine. A biscuit joiner is a great tool for home improvements that require you to make joints between two pieces. You can read on to learn more. Find out about safety equipment and biscuit glue when joining biscuits, as well as how to make them.
Chosening a biscuit jointer
Do-it-yourselfers may prefer a midrange biscuit jointer that can take most wood types. Cabinet shops might need a stronger model. Whatever your requirements are, there are several biscuit joiners available. Some come with storage features and are easy to clean, while others are more heavy-duty. Here are some factors to consider when choosing the right biscuit jointer.
There are many reasons why choosing a biscuit joiner can be important. It is versatile and can be used across many applications. A Biscuit Joiner's blade should be large enough for a wide range of materials. The machine should offer a variety settings and have an ergonomic handle. Additionally, it should include a dust collection port and bag. A biscuit joiner should be easy to use.
Choosing a biscuit
Before purchasing a biscuit-joiner, you need to be aware of several factors. There are many sizes and shapes of biscuits, so you need to select the right one for your job. You will find common sizes for biscuits in the following: #0, #11, and 12 to 15mm. Biscuits can also be made of plastic, PVC, or metal connectors. Consider the size of the blade and what type of teeth you are using. Biscuit joiners made with carbide teeth will last longer than others.

When choosing a biscuit joiner, you need to consider how much you will use it. Are you planning on making furniture or building cabinets? A midrange biscuit joiner can be used for general woodworking. However, larger projects will require a more powerful model. Based on your specific needs, choose between a wired or unplugged model. Once you have selected the right biscuit joiner to suit your needs, pick the one with the highest speed for maximum control.
Gluing biscuit joints
A biscuit jointer is useful for joining pieces of wood. Biscuits are able to absorb the glue that they're put in and will swell to make a precise alignment. A joint that isn't properly glued can cause it to fail or misalign. Use a water-based glue to prevent this. You should make sure that the glue is pushed into the slot and not onto your biscuits. Popsicle sticks can be used to spread glue and ensure biscuits are secured to the wood.
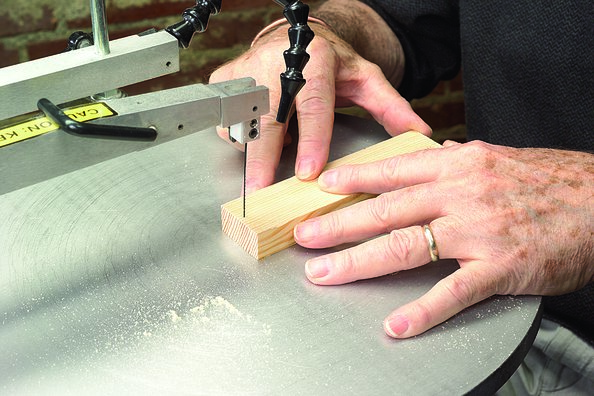
A biscuit jointer is a saw-blade that cuts holes in the wood to insert wood biscuits. The biscuits become stronger and more resilient by being glued. A biscuit joiner is generally used to join edges. Norm Abram shows you how he glues up a panel with a biscuit jointer.
Safety equipment that can be used in conjunction with a biscuit joiner
Every user of a biscuit jointer should be aware that there are some safety precautions. These precautions include never adjusting the biscuit joiner while it is in use, not pulling or straining the power cord, and never reaching under the workpiece with the cutting blade running. Make sure that the blade cover and cutter head are secured. Never allow the biscuit joiner to run while the blade cuts.
You can hold the biscuit joiner with one hand, and cut the biscuits. Make sure to secure your workpieces to a stable surface to stop them moving during the process of cutting biscuits. Inadvertently cutting too deeply into the biscuit joiner can cause serious injury. The blade may snap through the board if it is accidentally cut too deeply. Always wear safety glasses, and always wear a face mask.
Test a biscuit joiner
You need to learn how to test a biscuit joiner before you use it. Make a slot out of a piece wood scrap. Put the biscuit in the slot gently until it pops out. Next, mark the bottom of each biscuit with a pencil. After the biscuit is fully inserted, you can remove it from its slot and inspect the other side. Make sure that it's not jammed or blocked, and that there are no other objects in the slot.
A variety of sizes are available for biscuit joiners. By reviewing their features, you can find the best one to suit your budget and needs. There are two types: floor-mounted and handheld biscuit joiners. You can pick one depending on the size job you are looking for. The size you need can be chosen. For example, the Biscuit Joiner 90deg is lightweight and has a maximum angle of 90 degrees.
FAQ
Where can I purchase hardwood lumber?
Home Depot has hardwood lumber for sale. They sell all kinds of wood products, including flooring, cabinets, furniture, etc.
There is also a wide selection of engineered hardwoods, including Ipe (Araucaria Angustifolia), Brazilian Cherry(Pau d'Arco), Mahogany (Swietenia Mcrophylla).
These woods are available online by searching Google for "hardwood lumber".
How much money do you need to get going?
Because every project is unique, there aren't exact numbers. These factors will help you get an estimate of how much money is needed.
-
Material costs
-
Tools and equipment
-
The time spent on the project
-
Your hourly rate
-
What is your expectation for profit?
-
No matter if you are looking to hire someone
Start small, if possible. You can make simple boxes or picture frames if you're just getting started. You'll become more proficient as you get experience.
What tools do I need to start as a woodworker and what should I learn?
Woodworking is an art that takes patience and practice. It takes time for you to master the different techniques and tools that are required to woodwork.
There are many types of woodworking equipment on the market today. Some people prefer using power tools while others prefer hand tools.
You have the freedom to choose what tool you want, but it is important that you select the right tool for your job. Start with a basic set if you don’t have any previous experience.
You could also try learning how to use a router which is used to cut intricate shapes into wood. These tools can be purchased at most hardware stores.
What is the average time it takes to finish furniture?
It depends on the wood type you choose, the complexity and the amount you apply to the finished product. Hardwoods, on the other hand, are more durable than softwoods. Hardwoods are also more expensive than softwoods. They last longer and are more resistant to moisture. The typical time taken to finish a piece furniture takes anywhere from one to three month.
Do you have the skills to learn woodworking?
Learning by doing is the best way of learning anything. Woodworking is an art form that requires patience, practice, skill, and experience. It takes time to master any craft.
The best way to learn how to do something is actually to do it. Start small and then build upon what you've learned.
Statistics
- If your lumber isn't as dry as you would like when you purchase it (over 22% in Glen Huey's opinion…probably over 10-15% in my opinion), then it's a good idea to let it acclimate to your workshop for a couple of weeks. (woodandshop.com)
- Overall employment of woodworkers is projected to grow 8 percent from 2020 to 2030, about as fast as the average for all occupations. (bls.gov)
- Woodworkers on the lower end of that spectrum, the bottom 10% to be exact, make roughly $24,000 a year, while the top 10% makes $108,000. (zippia.com)
- Average lumber prices rose about 600 percent between April 2020 and May 2021. (familyhandyman.com)
External Links
How To
How to stain wood
The process of staining wood involves the application of chemicals to the wood's surface, which causes it to change its color. This chemical reaction causes wood to turn from whiteish to brownish. Oak is the most commonly used wood for staining, but other woods can also be stained.
There are many options for applying stains to wood surfaces. Some methods include mixing the stain along with a solvent like turpentine and then applying the mixture to the wood by brushing or spraying. You can also apply a solution containing water and dye directly to the wooden surface. The stain can be mixed with paints and varnishes to become part of the final coating.
Preparing the wood surface is the first step to staining it. Cleaning the wood thoroughly removes any dirt or grease that could interfere with applying the stain. Sanding smoothens any scratches or rough spots. The next step is to determine the type of stain you would like to use. Penetrating stains are different from non-penetrating. Penetrating stain penetrates deeper into wood than nonpenetrating, making them suitable for dark colors like mahogany. Penetrating stains are best paired with lighter colors, such as maple.
After deciding on the type of stain, you want to apply, prepare your tools. Paintbrushes are great for applying stain because they allow you to evenly spread the liquid across the surface. You should also have some handy rags to wipe up excess stains after you finish painting. If you plan to mix the stain yourself, make sure you have enough containers available to hold the different components of the mixture.
Once you have prepared your materials, start by cleaning the area where you plan to stain the wood. Use warm water and soap to clean away dirt and dust. Use a dampened rag and clean water to wipe the furniture. You should remove any debris, especially if your plan is to stain darker wood.
Next, apply the stain. Begin at one end and spray or brush the stain on the wood. Work slowly and carefully, moving back and forth along the grain of the wood until you reach the opposite end. You must be careful not to allow the stain to drip off the wood's edges. Before proceeding to the next step, let the stain dry thoroughly.
A coat of clear polyurethane sealing agent is applied to protect the paint. Apply three coats polyurethane sealer. Allow the third coat, which should dry overnight, to dry before sanding.