
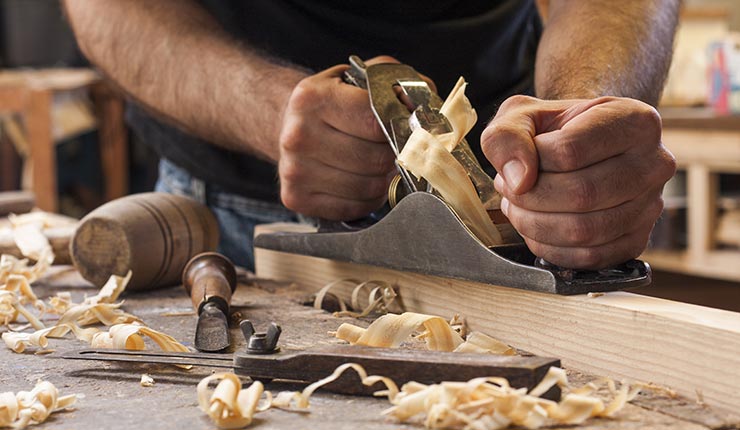
When glueing boards together, you will need glue. Glue can be applied to both sides of a joint, and a roller is an easy way to apply a thin coat of glue. Let the glue cure for at minimum 24 hours before moving to the next stage. After curing, any glue oozes can be cleaned off with a damp cloth. Any excess glue must be removed with a chisel. Don't skimp on curing time!
Glue boards should be used on both sides
Gluing boards from both sides will ensure that the finished product is flat and even. You should not rush the entire process. It is a delicate task and should be done in stages. These are some tips that will ensure you have a successful outcome. Make sure your board is level and not buckling. You should use the right amount of adhesive.

Apply glue to both the joints' edges
The benefits of gluing joints are numerous. For example, it makes the joint strong and prevents it from cracking or bending. Glue is not visible, so the edges are straight and smooth. A generous amount of glue should be spread evenly over the joint. Applying clamps at regular intervals along the joint will help create overlapping "cones of pressure" along the joint. This ensures a strong, thin glue line. Another great option is the lap joint. They provide a large gluing area. The following methods are recommended for this type of joint.
Aboard thickness can be added
Each board should be at least 12 inch thick when you glue them together. If you don’t add thickness, the wood pieces may look plywood-like. Multi-layered wood will give your final product a different appearance. You must pay attention to the grain when gluing multiple boards together. A poor grain match will ruin the beauty of your project. Avoid this problem by purchasing boards from one log. Add a little more for waste. Also, you can use stock that is already in your possession.
You can use a caul for glue boards
Gluing boards can be tricky, and using a caul is an effective way to ensure a flat surface and a strong bond. A caul is simply a piece of hard wood that you clamp perpendicular to the top of your table. Cauls should be made from hard wood and thicker in the vicinity of the glue seam. There are many options for how to use a caul with glue boards.
Avoidflex in cauls
It is important to avoid bowing when glueing boards together. Cauls curve so when they are raised, they apply upward pressure. Even if the boards are symmetrical, this can lead to edge to edge boards bowing. This can be corrected by making sure that edges are squared and panels are glued using a suitable adhesive.
Mirror-image grain patterns created using edge-glued board
Edge-glued boards can be made by joining two pieces of wood together with identical grain patterns. They are often used for veneers but can also made from solid boards. Resawing a piece of wood, and then joining the pieces using glue is what this process entails. In this article, I'll show you a couple of simple methods for achieving this effect. Continue reading to learn more.
FAQ
How can I organize my shop?
First, make sure you have a designated space for tools storage. You want your tools to stay clean and free from debris and dust. To hang accessories and tools, use pegboard hooks.
What else should I know about woodworking in general?
Furniture making is a laborious task. It's easy not to appreciate how hard it is. Finding the right type of wood is the most difficult aspect of this process. There are so many wood options that it can be difficult to choose the right one.
Another issue is that wood does not have the same properties. Some woods will warp and others will split or crack. Before purchasing wood, you should consider these factors.
Which wooden products are most popular?
These wooden products are the most popular. They were made from sustainably harvested wood.
The most used wood types for furniture are oak, maple and walnut.
These woods have beautiful grain patterns and colors. They are also very strong. If they are well cared for, they can last many years.
To protect wooden furniture from moisture damage, you should paint it first. This applies to all surfaces including drawers, doors, handles, and handles.
Paint that is water-resistant will ensure furniture lasts for a long time.
Followed by two coats, you should apply a quality oil-based primer. Depending on how much wear you expect, you might need to apply more coats of topcoat.
Avoid spray cans or aerosol colors. These products have solvents that evaporate quickly, leaving behind dangerous fumes.
How much money will I need to get started?
There are no exact numbers because every project is different. Consider these factors if you need to estimate the amount of money that you will require.
-
Material costs
-
Tools and equipment
-
Time spent on the project
-
Hourly rate
-
How much profit do you expect to earn
-
It doesn't matter if your goal is to hire help
Start small, if possible. You can make simple boxes or picture frames if you're just getting started. As you gain experience, you'll be able to tackle more complex projects.
Do I need to be a genius to succeed in woodworking?
No. Woodworking is not rocket science. You can create beautiful pieces of art by learning how to use simple power tools.
Statistics
- Overall employment of woodworkers is projected to grow 8 percent from 2020 to 2030, about as fast as the average for all occupations. (bls.gov)
- If your lumber isn't as dry as you would like when you purchase it (over 22% in Glen Huey's opinion…probably over 10-15% in my opinion), then it's a good idea to let it acclimate to your workshop for a couple of weeks. (woodandshop.com)
- Woodworkers on the lower end of that spectrum, the bottom 10% to be exact, make roughly $24,000 a year, while the top 10% makes $108,000. (zippia.com)
- The U.S. Bureau of Labor Statistics (BLS) estimates that the number of jobs for woodworkers will decline by 4% between 2019 and 2029. (indeed.com)
External Links
How To
How to make wood joints
This tutorial will teach you how to join two pieces wood together. We will be using the "pocket-hole joint", which involves drilling holes in wood and then gluing them together. This method works great if your wood is straight and smooth. You might consider dowel joinery if your wood isn’t straight or flat. These are the steps
-
Drill Pocket Hole Joints. To start, measure and mark where you want to put the pocket hole joint. Next, drill 3/4 inch holes in each end of each piece using a handheld drilling machine or jigsaw.
-
Sand Smooth. The wood's edges can be sanded to prevent splitting.
-
Glue both sides together. Apply glue to both ends of the wood. Allow it to cool for at least 5 minutes before you attach the pieces.
-
Clamp the Pieces Together. Once the glue has dried, clamp the pieces together so they are flush.
-
Trim Joinery. After the glue dries completely, trim off any excess wood around the joint.
Allow enough space between pieces so you can turn them inside out.